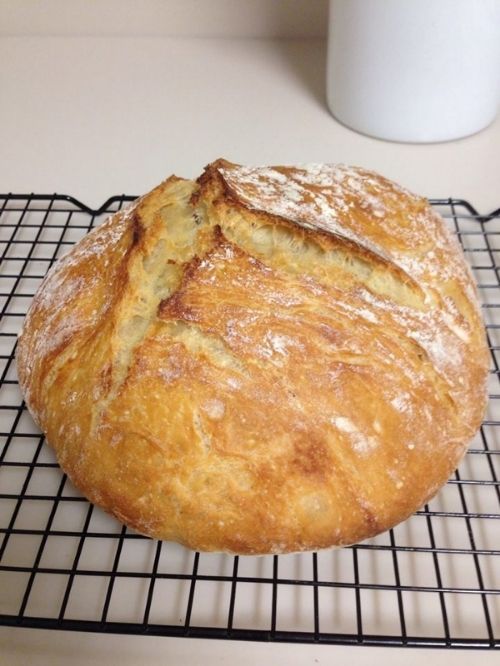
Crusty Artesian Bread
Baking this bread feels like I can compete with Panera. Haha. Joe is a huge bread person when it comes to meals as well as for lunch bread for sandwiches. This recipe is extremely easy yet it is sort of time consuming, because it does take about 12-18 hours for the bread to rise. However there is not a lot of active time. This is a no-knead bread so when I say easy it is literally impossible to mess up unless...you do not let it rise enough. I would consider making it at night and then baking it first thing in the morning. I have also included step by step pictures of how the process looked as I went along. I feel this would make it easier for other visual learners like myself. Enjoy! No more store bread!
Ingredients:
- 3c. All Purpose Flour
- 1 tsp Active dry Yeast
- 1/2-1 tsp salt
- 1 1/4c Warm Water
Directions:
- Combine flour, yeast, and salt in a large bowl.
- Pour water into dry mixture and mix with a wooden spoon until combined. Dough should resemble a very sticky dough. Add more water if needed 1TB at a time.
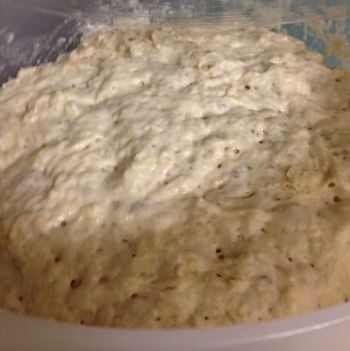
- Cover dough with plastic wrap and allow to remain at room temperature for about 12-18 hours (usually overnight).
- Preheat oven to 450 degrees. Once preheated place a dutch oven (empty) with lid into oven to preheat for 30 minutes.
- While dutch oven is preheating place dough on a very floured surface and form into a ball. Minimal contact is good here. Remember to flour hands because the dough is very sticky.Once in a ball place plastic wrap (the same that covered the bowl) over the dough and let rest 30 min while pot is in the oven
- Once the dutch oven is preheated place the dough into the dutch and cover with lid. The oven will be very very hot so be careful doing this. No need to oil pan the bread will not stick trust me.
- Bake at 450 for 30 min.
- Take lid off after 30 min is up and bake for an addition 15 minutes to get a nice crusty golden crust.
- Once finished cool completely and slice for everyday use.
Step by Step Pictures
This is how the dough should look while rising. In step 3.
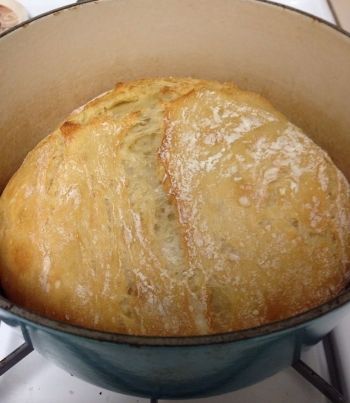
After placing the dough the pot and baking for the 30 min. with the lid on. Steps 6-8
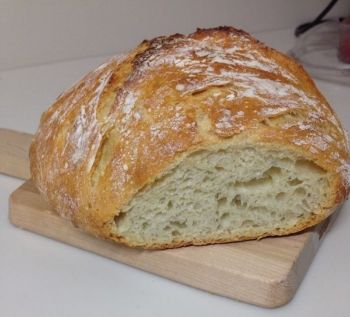
The final inside product! Delicious!!


No comments:
Post a Comment